***DRAFT*** Introduction to assemblies in NX and Teamcenter.
Files assembly
- Download files and place in one folder
- Create a new part file in the same folder with the name pipe_clamp_assembly.prt
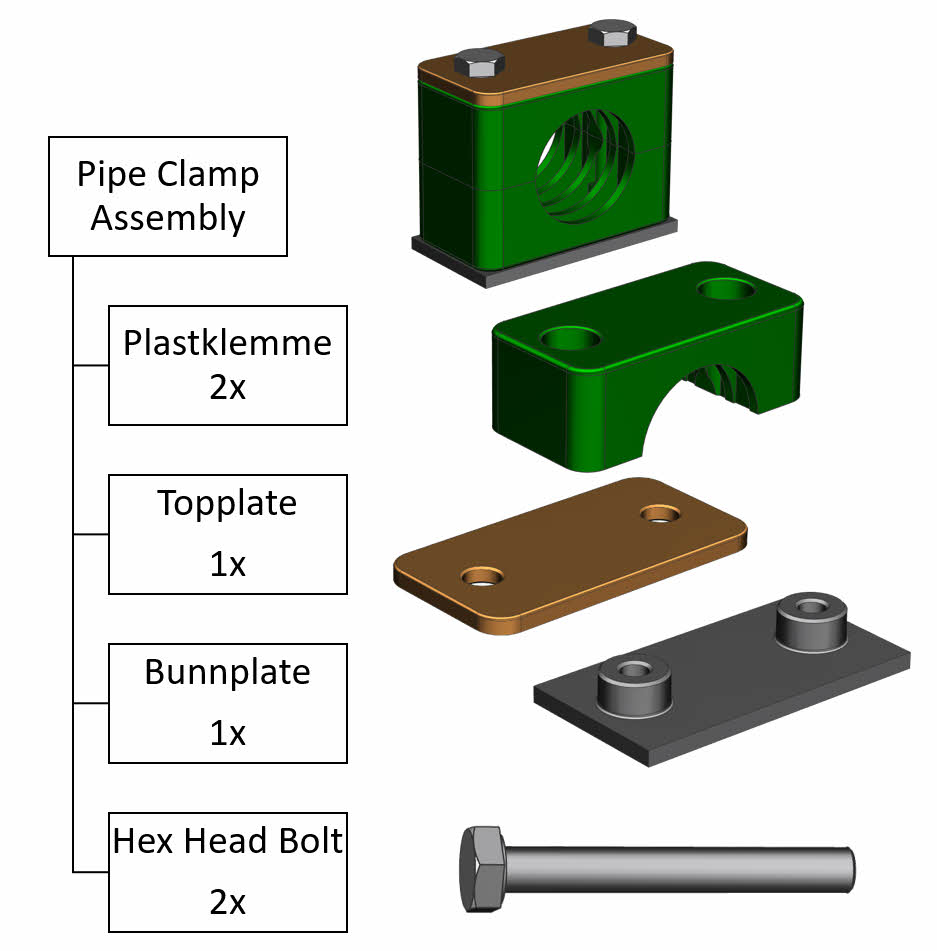
- Add part-files to the assembly with Add Component commando. Start with the bottom plate.
- Position the components by using the Assemble commando and select surfaces to define assembly constraints between the components. Each component needs three assembly constraints to fully define the position.
Teamcenter assembly
- Start NX in Managed mode and login with your user credentials to connect NX to the design database (Teamcenter). This replaces traditional local file handling with a connection to a design database which handles and stores all your 3D-design data. It also gives you access to part libraries and design data from other engineers in your team.
- Create a new item in (NX part-file) in Teamcenter and assign item id and name.
- Add components to build your assembly. Start with bottom plate.
- Item 002885_A BUNNPLATE
- Item 002884_A PLASTKLEMME
- Item 002883_A TOPPLATE
- Item 002882_A HEX HEAD BOLT
- Position the components by using the Assemble commando.
